During a cycle its recommended not to do any water changes, you need the ammonia produced by the fish waste so beneficial bacteria will grow and break it down.
The tank has now been running for almost a month and while the "Start Zyme" I used was supposed to bypass the cycle all together, it didn't. Ammonia built up I lost three fish, So I had to let the tank cycle the old fashioned way
Tuesday Ill be doing a water change, Walking you through the process with photos like Ive done every other post.
Sunday, May 29, 2011
Friday, May 20, 2011
Fish Added, Start Zyme Not reccomended
Usually I would recommended a fishless cycle, boring yes, but you don't needlessly kill fish.
With the Freshwater Biobubble I decided to use Start Zyme, which supposedly adds the beneficial bacteria to the tank from the start so its safe for fish from day one, making the cycle instant.
Well one week into having fish, I notice two are unfortunately dead, I test the ammonia, and its at 2ppm NOT safe for fish. the Start Zyme effectively did nothing, tank is still cycling like normal
So save your money, kill less fish, don't use Start Zyme
Monday, May 16, 2011
Setting up the BioBubble

Here is the Decor I'm using for the freshwater setup, I prefer more of a natural look so I went with natural looking gravel, Stones, and Silk plants (When wet Silk plants look real). Along with the decor I picked up a bottle of water conditioner, Which if your using tap water you'll want to use at it neutralizes the chlorine. Also I picked up a bottle of "Start zyme" which is supposed to help seed new tanks with the beneficial bacteria needed to break down fish waste and keep it from building to toxic levels during the tanks cycle.

Gravel

Extra Stones

Artificial plants

The Base is opened up and the lid is off, Time to fill the BioBubble.

Once the BioBubble is close to full you can put the lid back on and close the four latches, locking the dome down and making a water tight seal

Now that the dome is pressed down and locked into place it can be filled completely. To be honest I was a little weary when pressing the Dome down, watching the water fill it in, I was checking for leaks making sure the domes gasket was doing its job, and it was, No leaks


The tank Looks great and is ready to go. Conditioner and Start Zyme have been added. Fish will be added in a day or so.
Saturday, May 7, 2011
Unboxing the BioBubble

Upon opening we see the Removable bedding plate, used for when the habitat is home to small animals and reptiles.

Displayed here is the contents of the Parts bag: Owners Manual, Filter and Air Pump, Clips, Tubing and Dome gasket. I noticed here that the parts bag was placed ontop of the dome, there was a sheet of Bubble wrap but it was not enough as the Dome was lightly scratched in shipping. I would reccomend the manufacturer to wrap the done itself in bubblewrap as acrylic is easily scratched.

Further unboxing reveals the fence, Used when the BioBubble is housing small critters like dwarf hamsters.

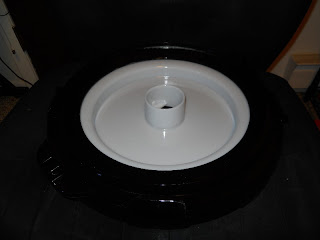
The BioBubble Base, The hole in the middle is where the filter sits when used as an aquarium, and plugged by the Removable bedding tray when used for critters.

The rubber gasket included goes around the rim of the dome and creates a water tight seal.

The four Side clamps are used to unclip the Dome from the base and the two side latches are Squeezed, The base is pulled up extending the unit. Decorating/Tank maintence is done while the tank is extended like this. Once the base is pressed down water rushes back into the dome and the side latches lock the base down. The tank is designed so the dome cannot be removed unless the tank is extended, preventing the water from leaking/flooding out.

Here it is fully assembled and set up for aquarium use, The filter can only be installed one way, you simply line up the grove on the filter with the line on the base and press down fully, The filter has two gaskets and completly seals the unit making it water tight.
All in all its a solid unit, parts do not seem flimsy or easily bent. Next Post I will be setting up this BioBubble as a freshwater aquarium
Thursday, May 5, 2011
BioBubbles Arrived!
Monday, May 2, 2011
BioBubble Review Soon
The Manufacturers of the All New BioBubble, Has asked me to review their product.
http://www.biobubblepets.com/biobubble.php
When it arrives I will be setting up two BioBubbles, One is a freshwater tank the other will be a saltwater setup. I look forward to putting the tank through its paces, I believe that even though the tank size limits its inhabitants there are still plenty of options out there to have a fully funcitioning and beautiful aquarium.
I will be keeping these tanks running for months, showing that even small tanks can be completely stable.
Subscribe to:
Comments (Atom)

